After open-sourcing my blog, I received a lot of positive feedback and questions from friends, including a nearly 50-year-old non-professional programmer. This inspired me to write a guide to help others quickly set up their own blog using gblog.
Preparation
Before starting, you need some basic knowledge. Initially, I wanted to write a guide from scratch, but I realized it would involve too much information. So, I assume you have the following background:
- Basic knowledge of frontend technologies (e.g., HTML/JS/TS)
- A GitHub account
- Git and NodeJS installed on your machine (optional)
- Ability to use the terminal to run command-line programs (e.g.,
npm run dev, optional) - A Cloudflare account (optional)
If you have no technical background, you might wonder why you need to know these things. This is a static blog with no admin panel or database, meaning all blog data is stored in individual HTML files. Any modifications must be made directly to the source code.
But don’t worry, I will guide you step-by-step in the following tutorial.
How to Deploy
Following the principle of Success First, let’s deploy it to the Cloudflare platform first. If you want to deploy to other platforms like Zeabur or Vercel, you can click the Deploy button in the documentation to deploy with one click.
Deploy to Cloudflare 1 - Create a New Fork
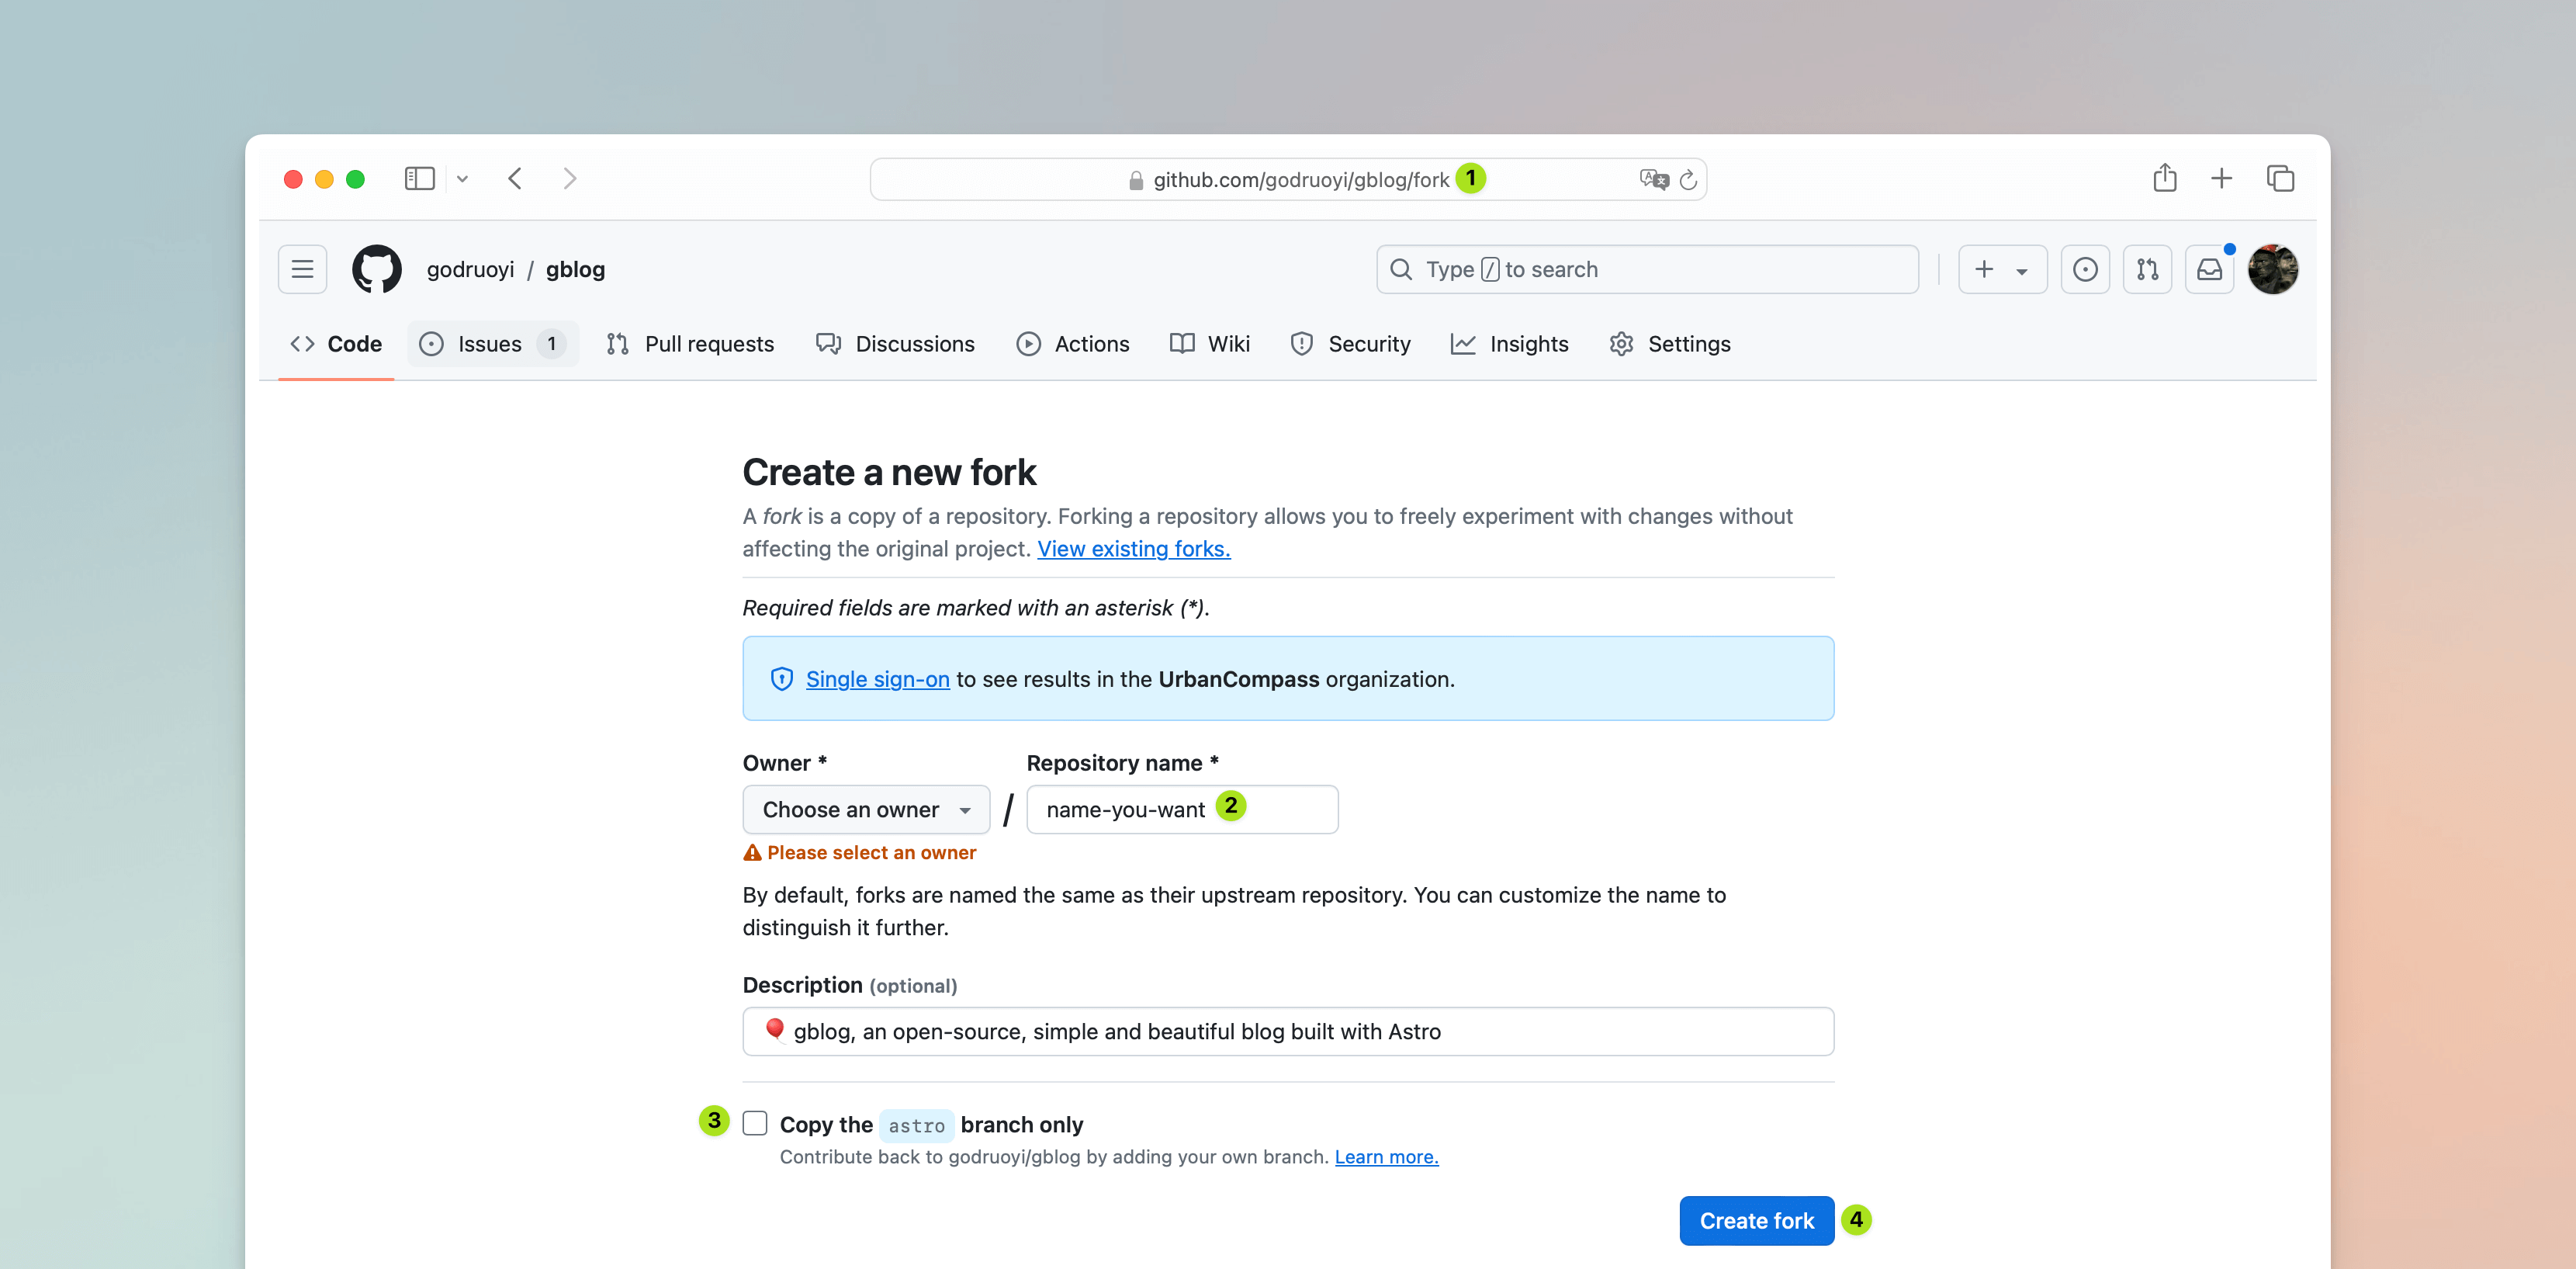
- Log in to your GitHub account and fork the gblog project.
- Make sure to uncheck “Copy the
astrobranch only” when forking.
GitHub’s fork allows you to quickly create an identical project under your account. We need to uncheck the option because we will use another branch (gblog-template) for deployment. The default astro branch contains all my blog posts and images, which can significantly slow down the initial deployment due to image optimization. You can also use the latest astro branch and delete the data under src/content/posts to speed up the compilation.
Deploy to Cloudflare 2 - Build
After forking the project, log in to your Cloudflare account. In the left menu, find Workers & Pages, and create a new Page. You can refer to this documentation or the video clip below for detailed steps. When selecting the Production branch, choose the gblog-template branch to save build time.
Once deployed, you can access the newly created blog through the default domain provided by Cloudflare. If everything is set up correctly, you should see a beautiful blog page like https://gblog-test-1.pages.dev.
How to Publish Articles
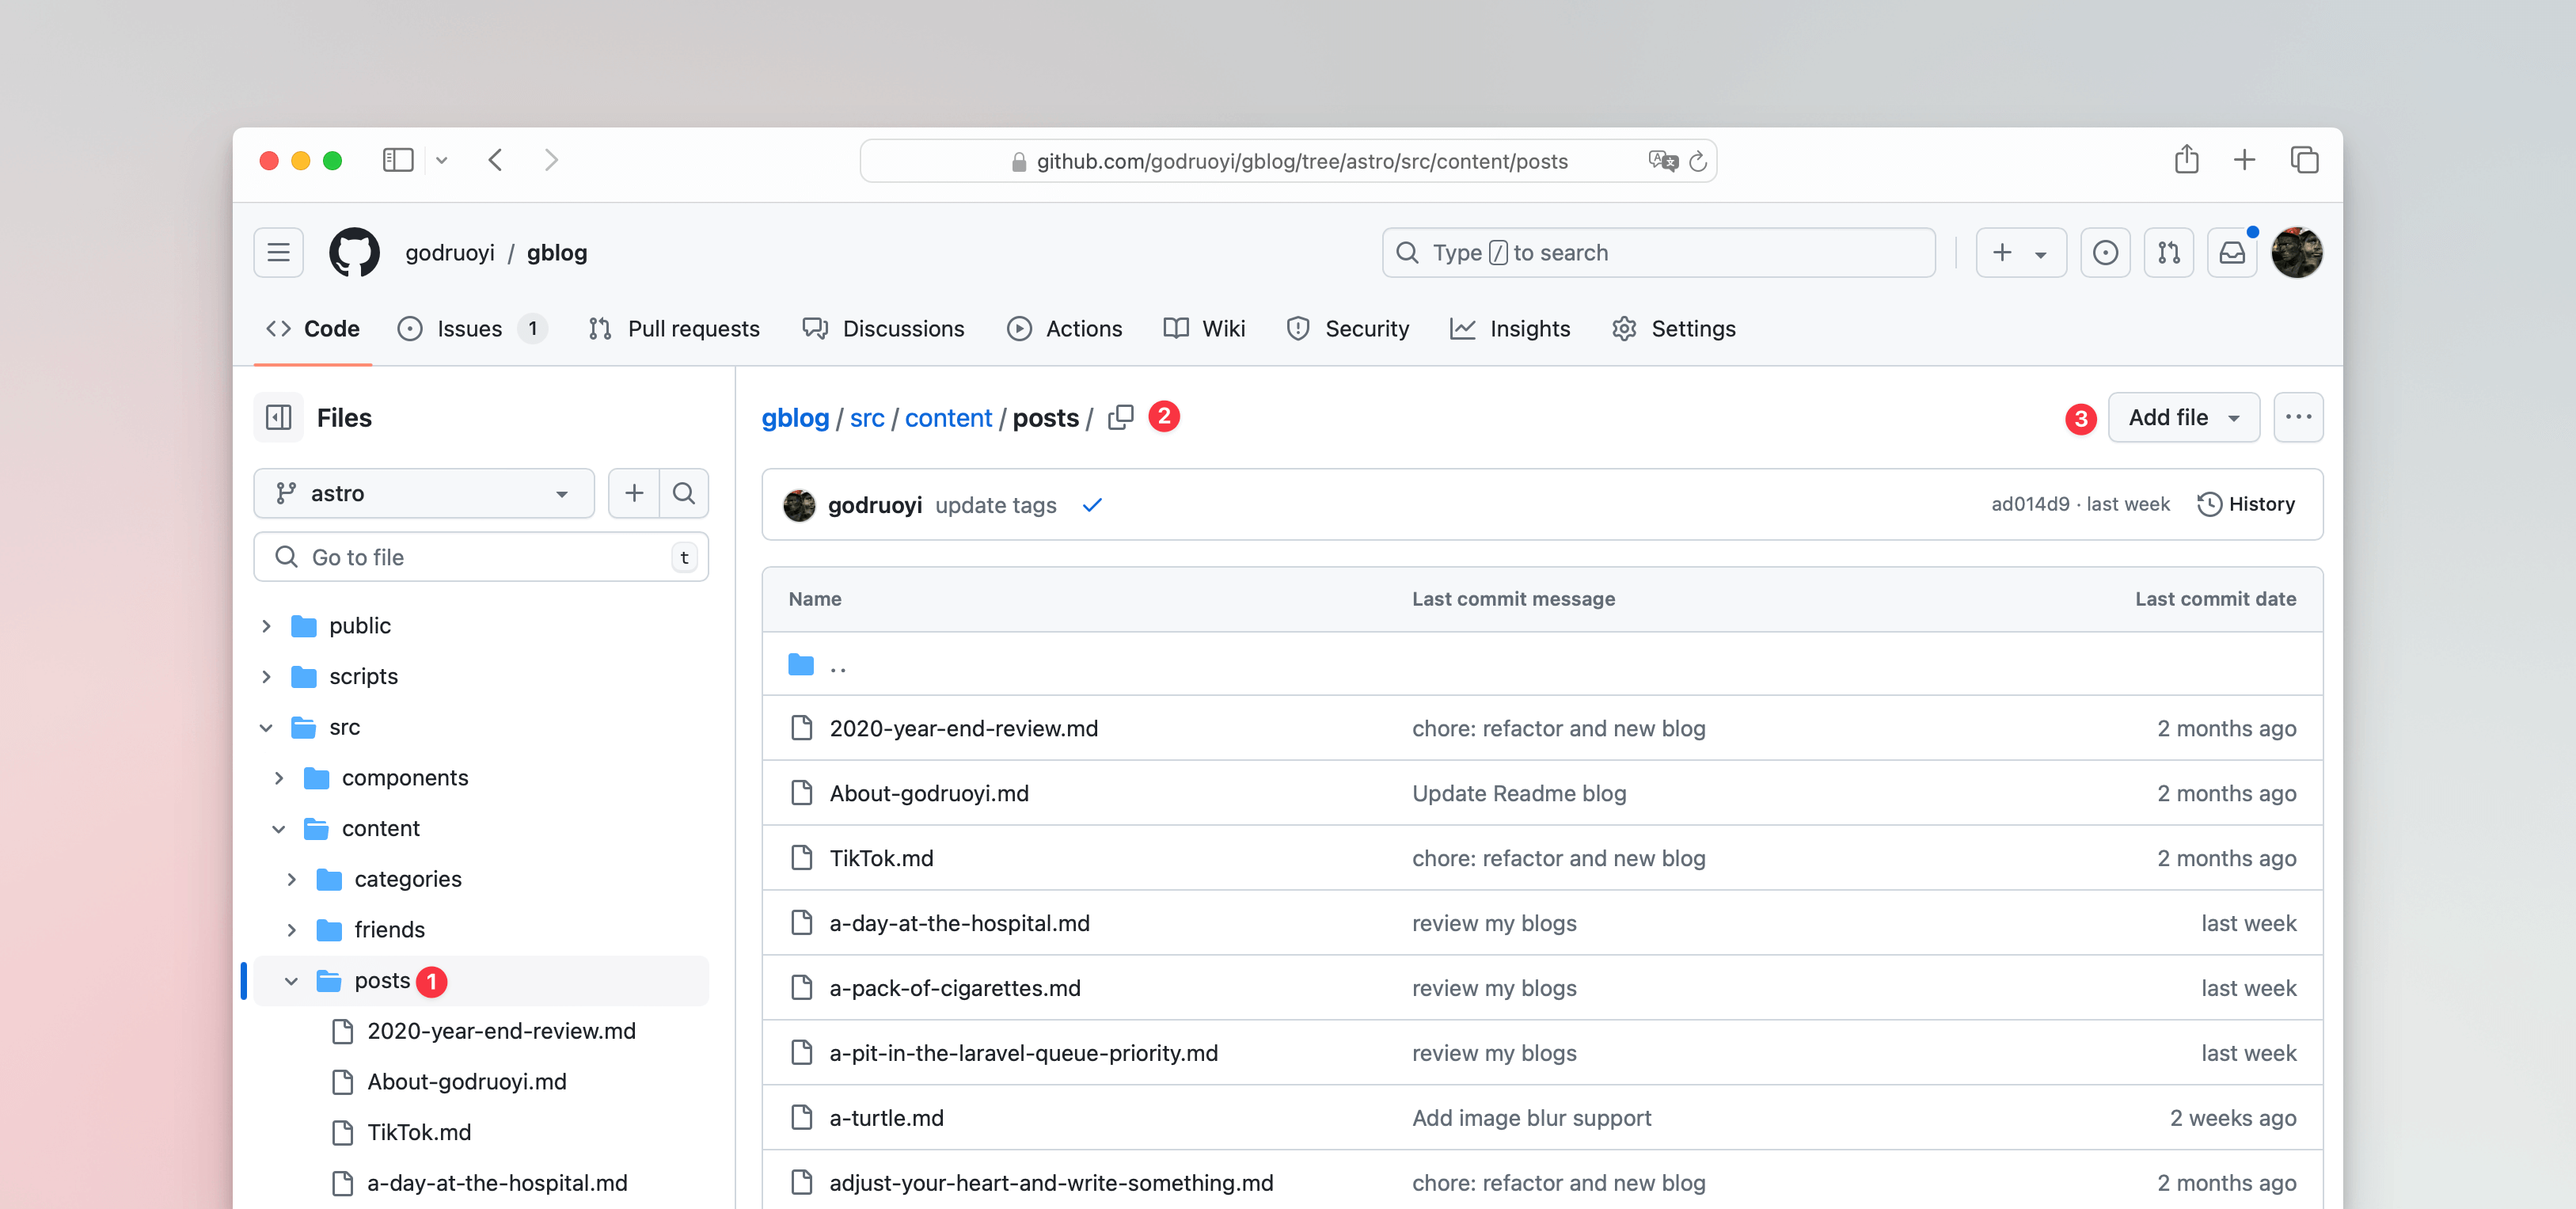
Static blogs do not have an admin panel to manage blog data, and we do not plan to add CRM support for gblog. To publish your own articles, you need to add a new file in the corresponding directory. Each file represents a blog post.
The simplest way is to add a file in the src/content/posts folder via GitHub, as shown below:
The file extension is usually .md or .mdx. The fixed format for blog posts is as follows, and you can find more configuration options here:
---
title: "Title"
description: "Description"
pubDate: "Publication date, e.g., 2021-11-12 03:10:04"
category: "tool"
banner: "Cover image"
tags: ["Tag1", "Tag2"]
---

Content
MD/MDX are Markdown formats. If you are not familiar with this format, I recommend checking out this Markdown tutorial.
Here are some key points about the fixed format for blog posts:
- The attribute name is before the colon (:), and the attribute value is after it. The attribute value is usually enclosed in double quotes.
- A blog post can only have one category, and it must be the filename of an existing file under
src/content/categories(e.g., astro/tool). - To add or remove categories, modify the files under
src/content/categories. - The cover image (banner) can be an online image URL, e.g., https://example.com/a.png.
- If the cover image (banner) is a local image, place it in the
src/images/directory.- For example, if you create a new folder
helloundersrc/imagesand place an imagebanner1.pngin it, the banner field for the blog post can be configured as@images/hello/banner1.png. Note the@symbol at the beginning.
- For example, if you create a new folder
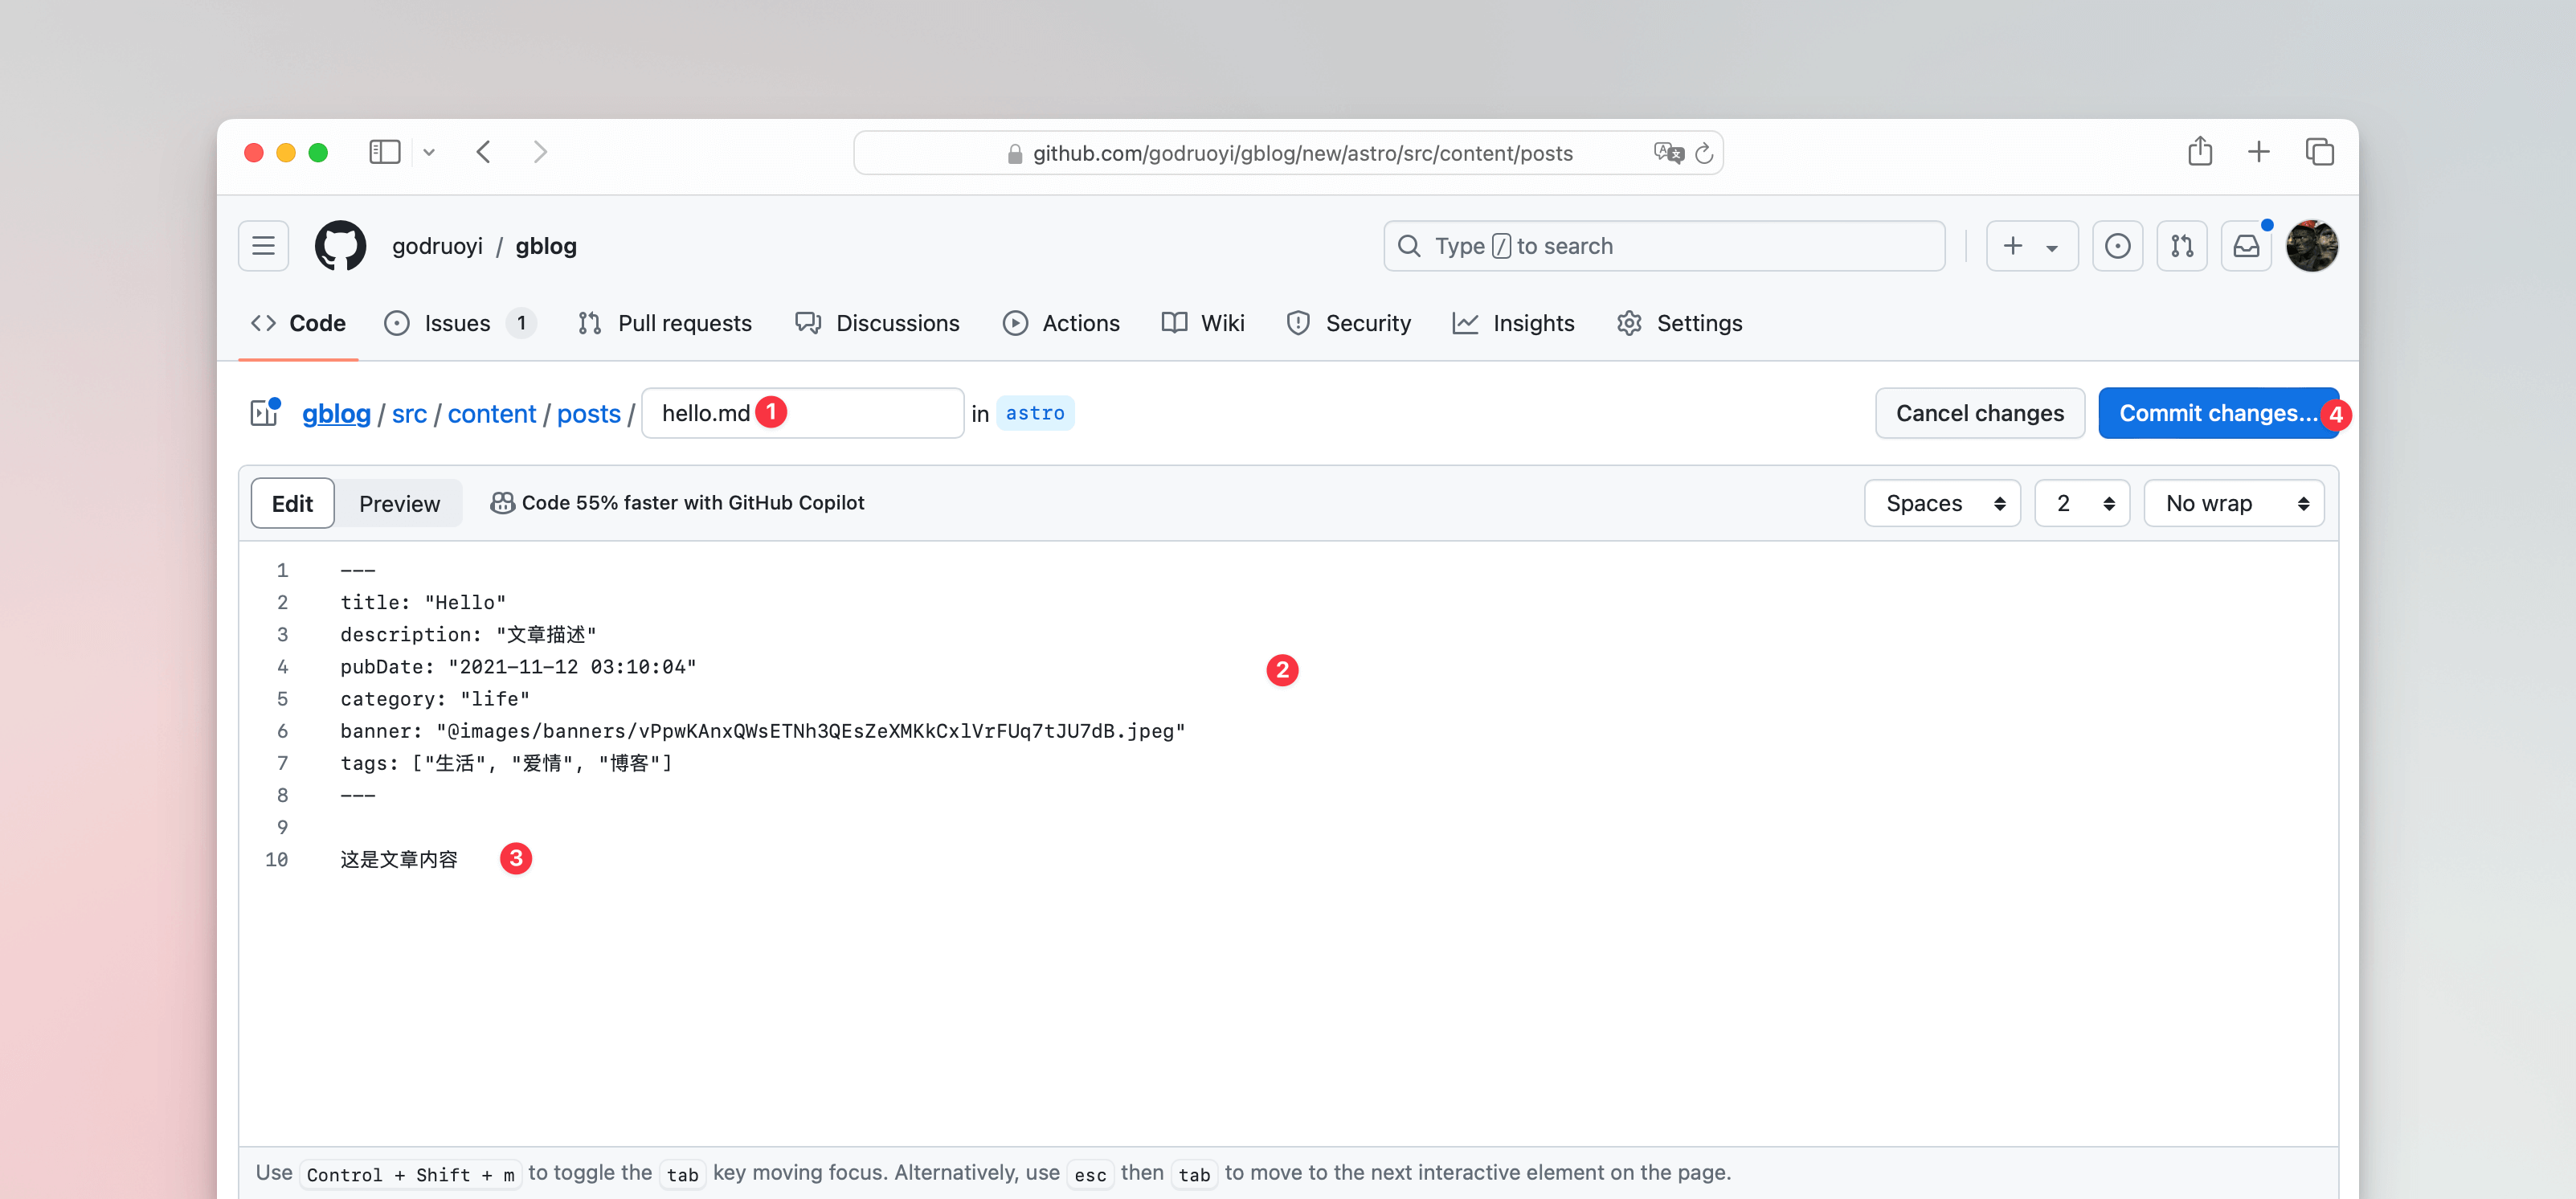
Here is an example. We created a new file hello.md. Once all the content is ready and you click Commit changes, the changes will be automatically deployed to Cloudflare if everything is set up correctly. After successful deployment, you can access the newly added blog content via a URL like https://example.com/posts/hello.
How to Edit the Project Online (Optional)
If you cannot edit and run the project locally, you can use github.dev to edit the blog content online. Here’s how:
- Change the domain suffix from
comtodevin your project URL, e.g., https://github.com/godruoyi/gblog. - Or press the
.key (period) on the GitHub project page.
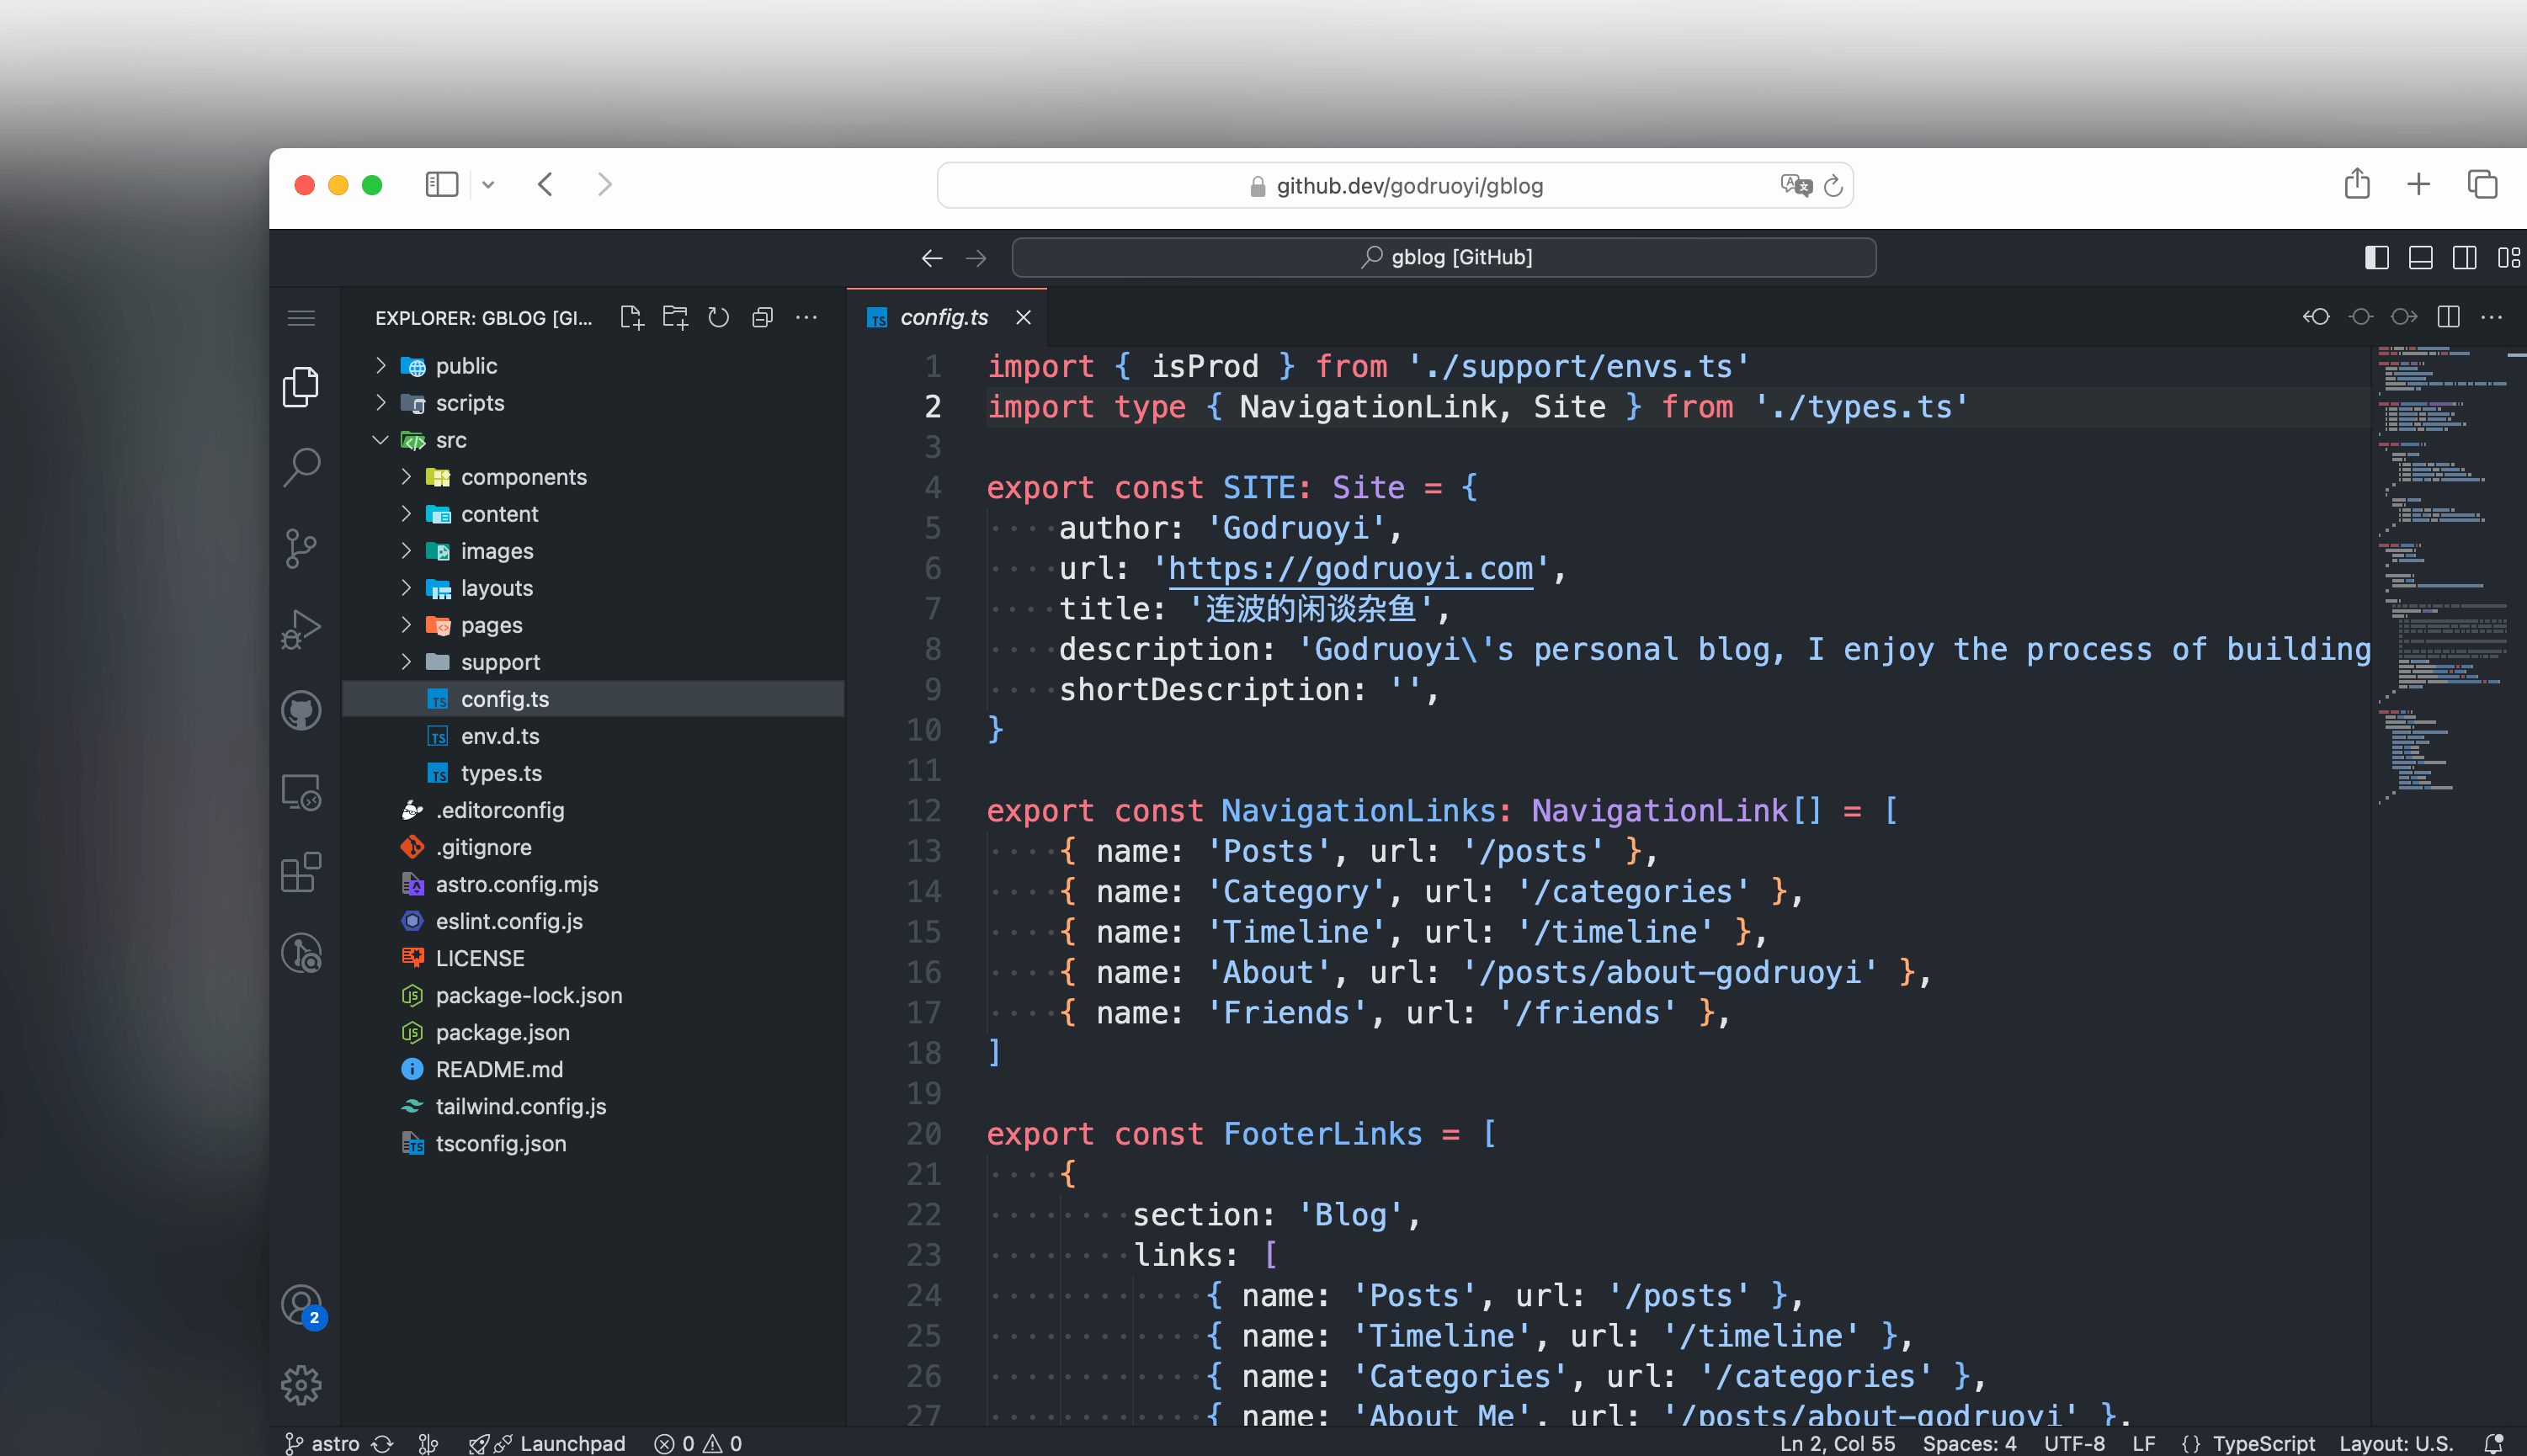
This will open an online editor based on VSCode, where you can edit any content you want. For more information on github.dev, refer to github.dev web-based editor.
How to Run the Project Locally (Optional)
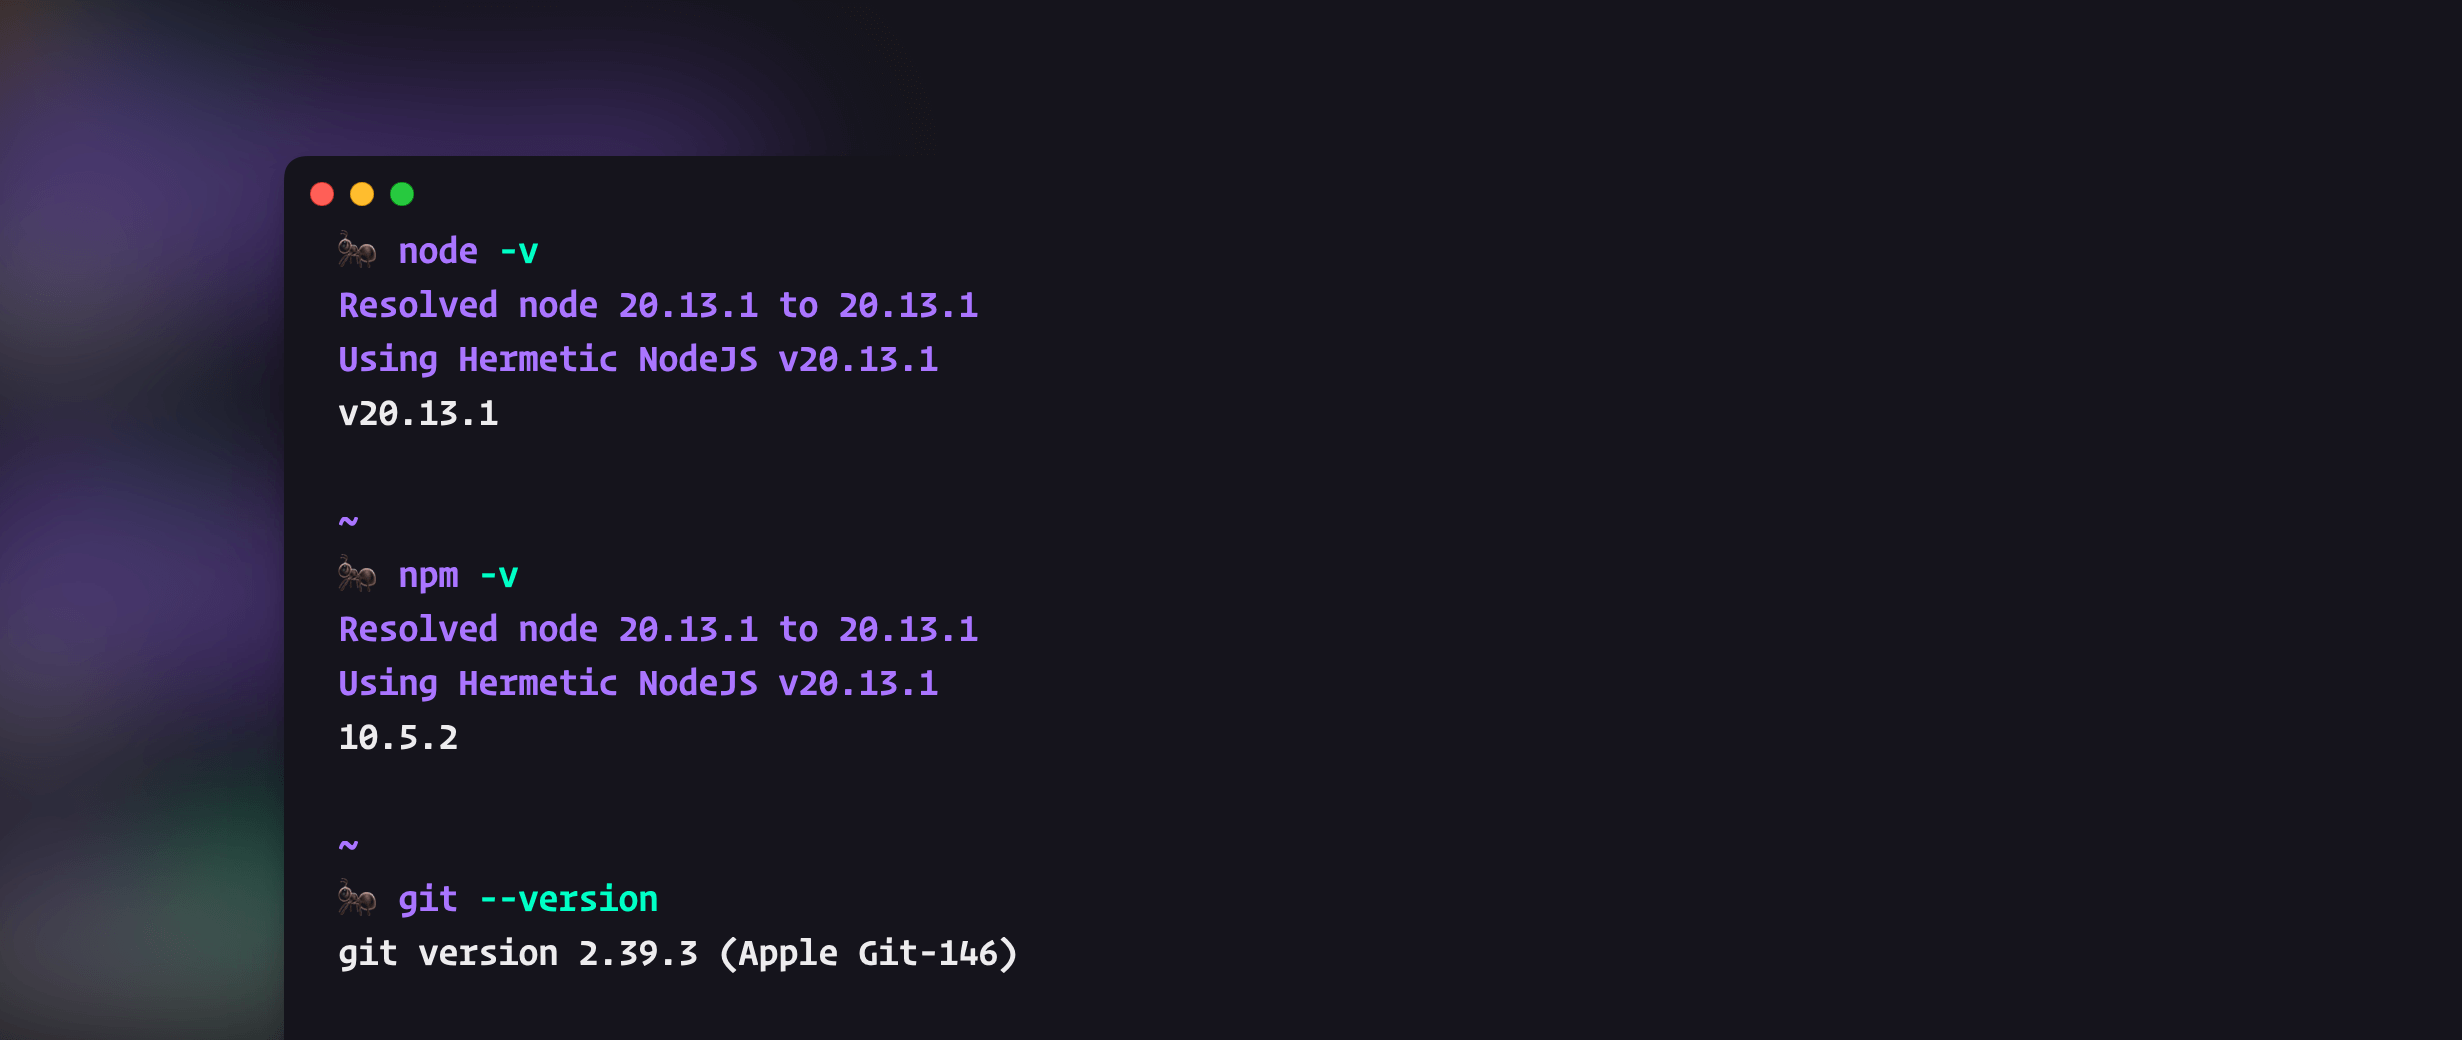
Before running the project locally, ensure you have Git installed. Open your terminal (Windows & MacOS) and type git --version to check. This usually outputs the installed software version, as shown below. If you haven’t installed them yet, you can find the installation links at the end of this document.
After successful installation, run the following commands in your terminal:
git clone git@github.com:yourname/your-blog.git myblog
The Git Clone command will download your project code to the myblog folder in the current directory. Note to change the project URL to your project’s URL, as shown below: 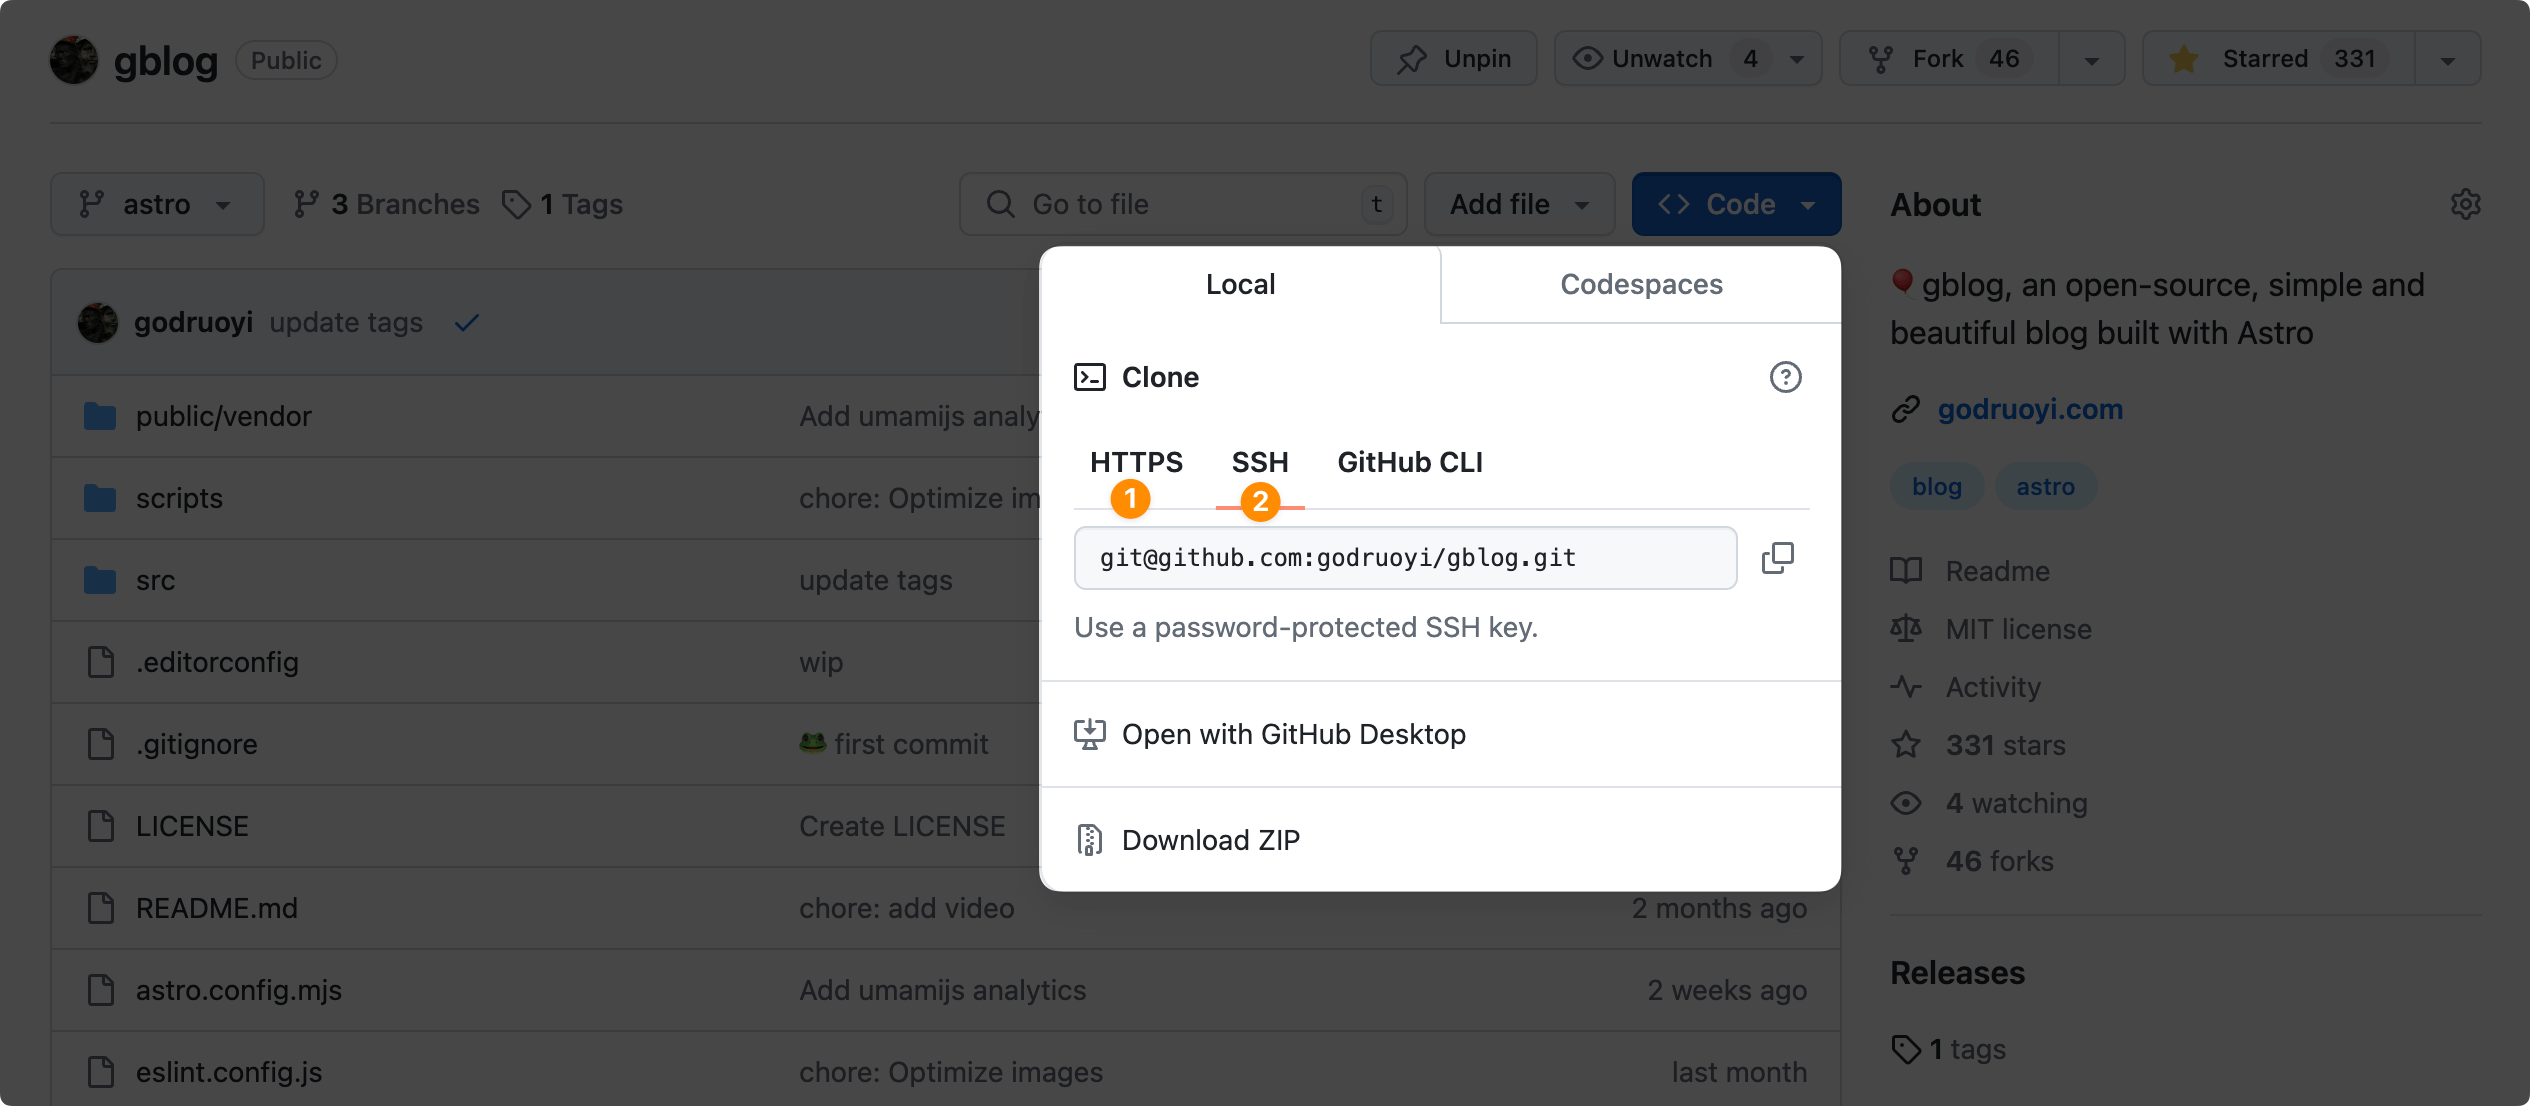
You can choose either the HTTPS or SSH project URL. The former requires you to enter your GitHub username and password every time you commit code, while the latter allows passwordless commits. Refer to this article to configure SSH.
Next, use the CD command to navigate to the blog directory and run npm install to install dependencies. If this step fails or takes too long, you can try switching the npm mirror to a domestic source, as described in the Taobao mirror setup tutorial.
# Navigate to the myblog folder
cd myblog
# Install blog dependencies
npm install
# Start a local development preview
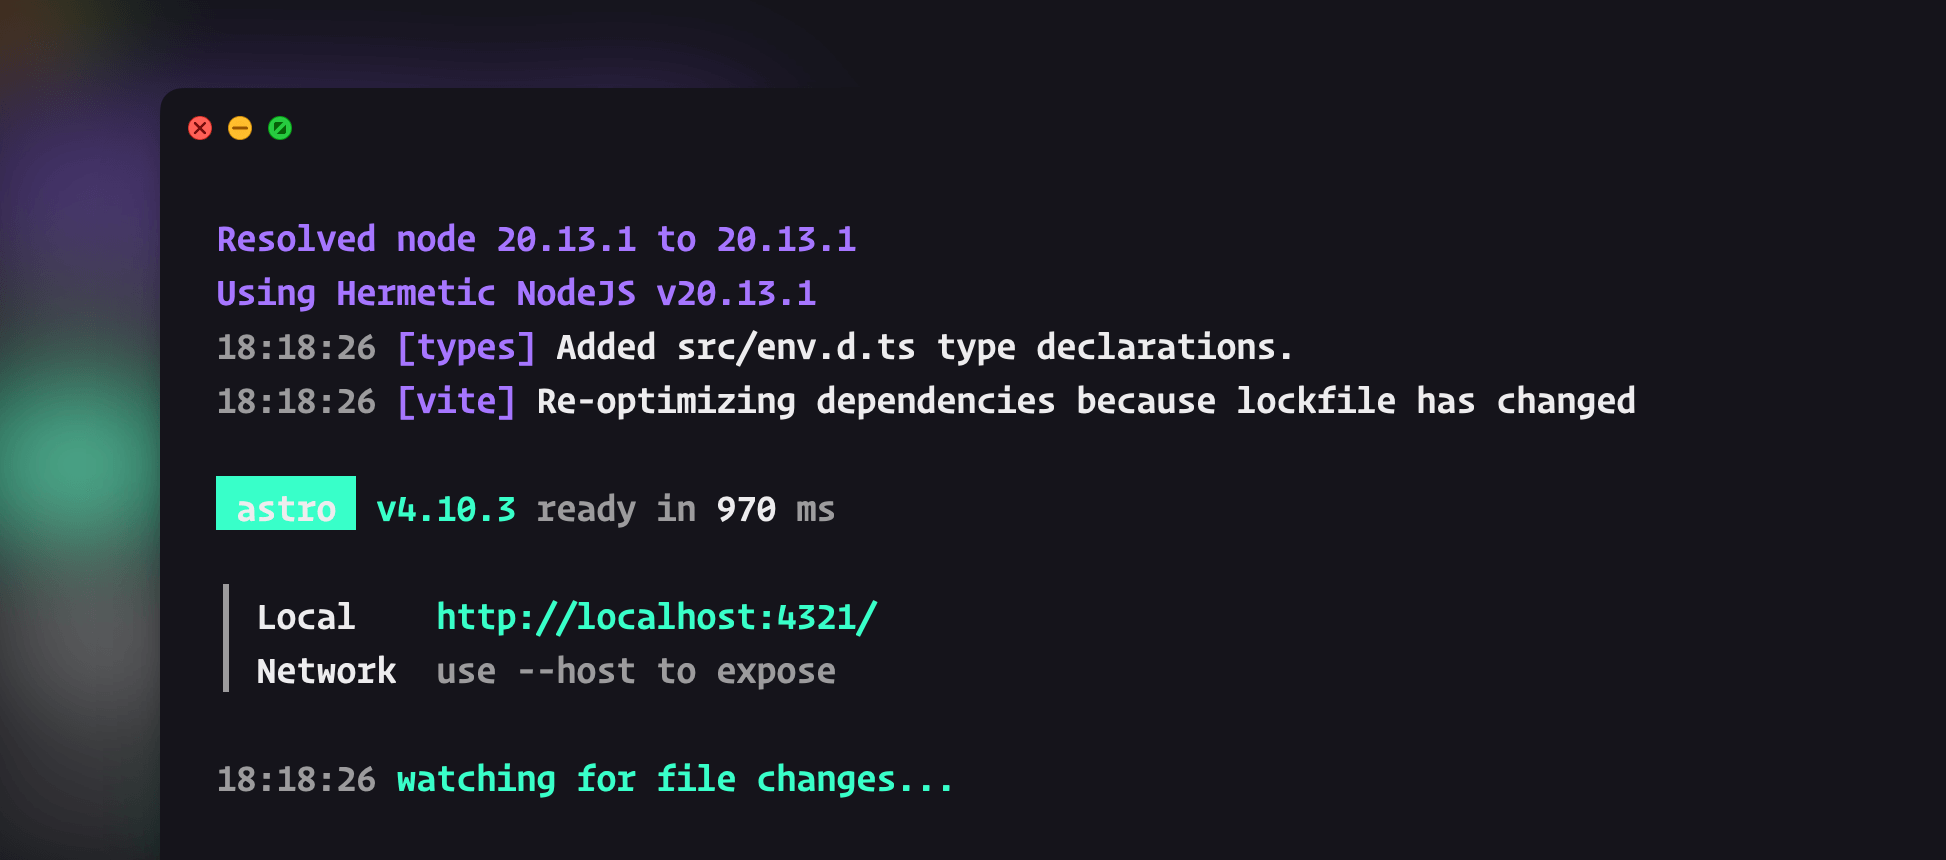
npm run dev
After successfully running the last command, you should see a prompt indicating that the blog is running locally. You can view the local preview at http://localhost:4321/ and edit it using your preferred editor, such as Sublime Text, VSCode, or IDEA.
After making local changes, you can commit these changes to GitHub using the following commands:
git add .
git commit -m "Brief description of the changes"
git push
Regardless of whether you deploy your blog to Zeabur, Vercel, or Cloudflare, they will automatically deploy your changes after you commit the code. This is usually because the platform providers have automatically set up the corresponding triggers during the initial integration.
How to Customize
The default blog template includes many preset configurations such as Logo, comments, SEO, and default text. Use any editor you like to open the source code and edit them.
Custom Configuration
Most blog configurations are defined in the src/config.ts file. You can modify them to suit your preferences:
export const SITE: Site = {
    author: "Godruoyi",
    url: "https://godruoyi.com",
    title: "Godruoyi's Blog",
    description:
        "Godruoyi's personal blog, I enjoy the process of building something using any technology stack",
};
Custom Images
The blog currently uses the following images as system images. Replace them with your own images. If you need to change the filenames, search for all related filenames globally and replace them together.
src/images/brand_logo.jpeg        Logo
src/images/default_home_og.png    Social media sharing image for the homepage
src/images/favicon_icon.png       ICON
src/images/favicon_icon.svg       ICON SVG format
src/images/footer.png             Placeholder image displayed at the bottom right of the page
src/images/home.png               Homepage header image
Custom Descriptions
Some text descriptions, such as “Life cannot always be satisfying, but we must live enthusiastically,” are not placed in the configuration file. You need to search globally and find the corresponding files to modify them.
Custom Comments
We currently use https://giscus.app/ as the comment system. Refer to the Giscus website for configuration instructions, or check out liruifengv’s blog post Add Comments to Astro.
Note that blog comments are disabled by default. You can enable them by setting the COMMENT_ENABLE environment variable to true or directly modifying them in the src/config.ts file.
export const Settings = {
    Comment: {
        // enable: !!(import.meta.env.COMMENT_ENABLE),
        enable: true,
        giscus: {
            repo: "godruoyi/gblog",
            repoId: "MDEwOlJlcG9zaXRvcnkxMjcyODI0NzA",
            category: "Announcements",
            categoryId: "DIC_kwDOB5YtJs4CfZnX",
            darkThem: "noborder_gray",
            lightThem: "light",
        },
    },
};
Upload Resources to S3 for Faster Access
We can upload all compiled resource files, such as images, CSS, and JS, to the S3/R2 platform for faster access. This feature is based on Yufan’s astro-uploader tool. Visit the project to see how to configure it.
// src/config.ts
export const Settings = {
    Assets: {
        uploadAssetsToS3: !!import.meta.env.S3_ENABLE,
        config: {
            paths: ["assets"],
            endpoint: import.meta.env.S3_ENDPOINT as string,
            bucket: import.meta.env.S3_BUCKET as string,
            accessKey: import.meta.env.S3_ACCESS_KEY as string,
            secretAccessKey: import.meta.env.S3_SECRET_ACCESS_KEY as string,
            root: "gblog",
        },
    },
};
上述配置的含义是将编译后的 assets 文件夹下的所有文件上传到 S3 服务器的 gblog 文件夹下,这通常需要配合修改 astro.config.mjs 文件如下:
// astro.config.mjs
export default defineConfig({
    build: {
        assets: "assets",
        assetsPrefix: "https://images.godruoyi.com/gblog",
    },
});
This tells Astro to package all resource files into the assets folder during compilation. After compilation, the program will automatically call astro-uploader to upload these files to S3. Therefore, we need to tell Astro to use the S3 path, such as https://images.godruoyi.com/gblog, as the prefix.
Note that you may also need to set the corresponding environment variables on the deployment platform.
How to Add New Features
The blog’s UI uses Preline UI. You can copy the styles you want from their Example or Template and paste them directly into gblog. Usually, you don’t need to make many modifications to clone the desired effect.